最近在做应用鸿蒙化,说白了就是把原来Android、iOS的代码重新用ArkTS写一遍,我负责基础建设和登录模块,有个验证码输入框需要定制一下外观样式。这里详细记录一下探索过程及结果,以及思路和源码。这里给出了三种方案inputMethod.InputMethodController控制键盘弹起并记录输入内容,刷新到 Text 中展示
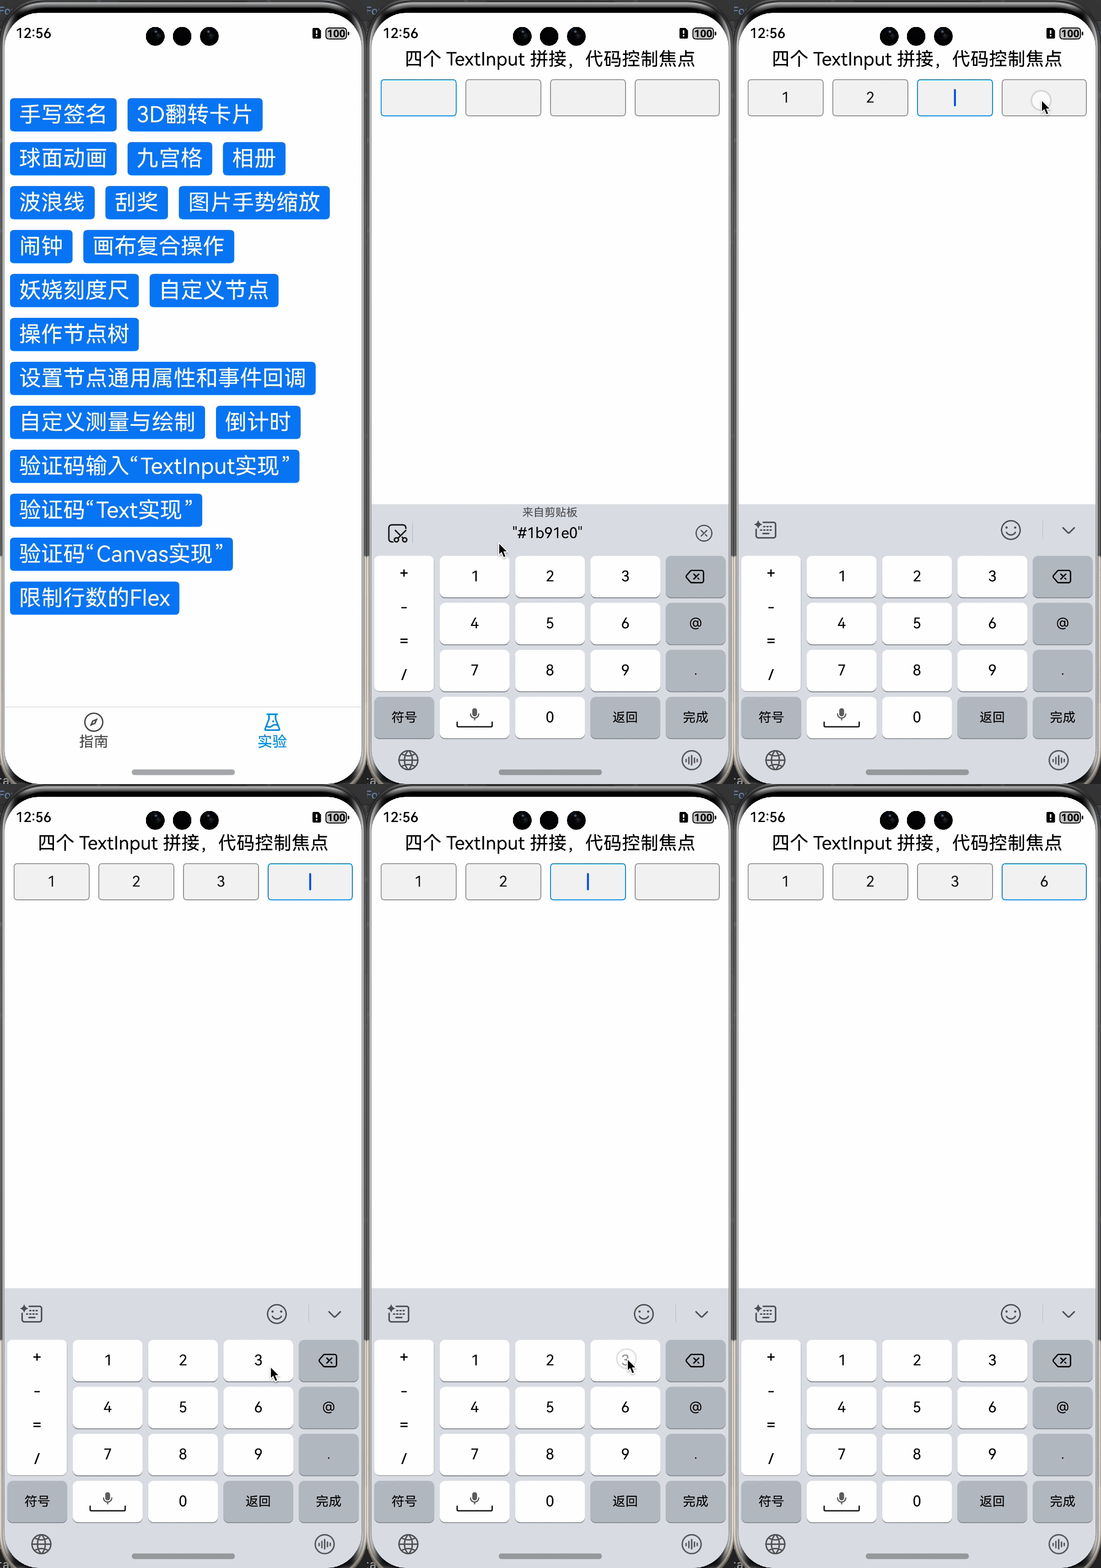
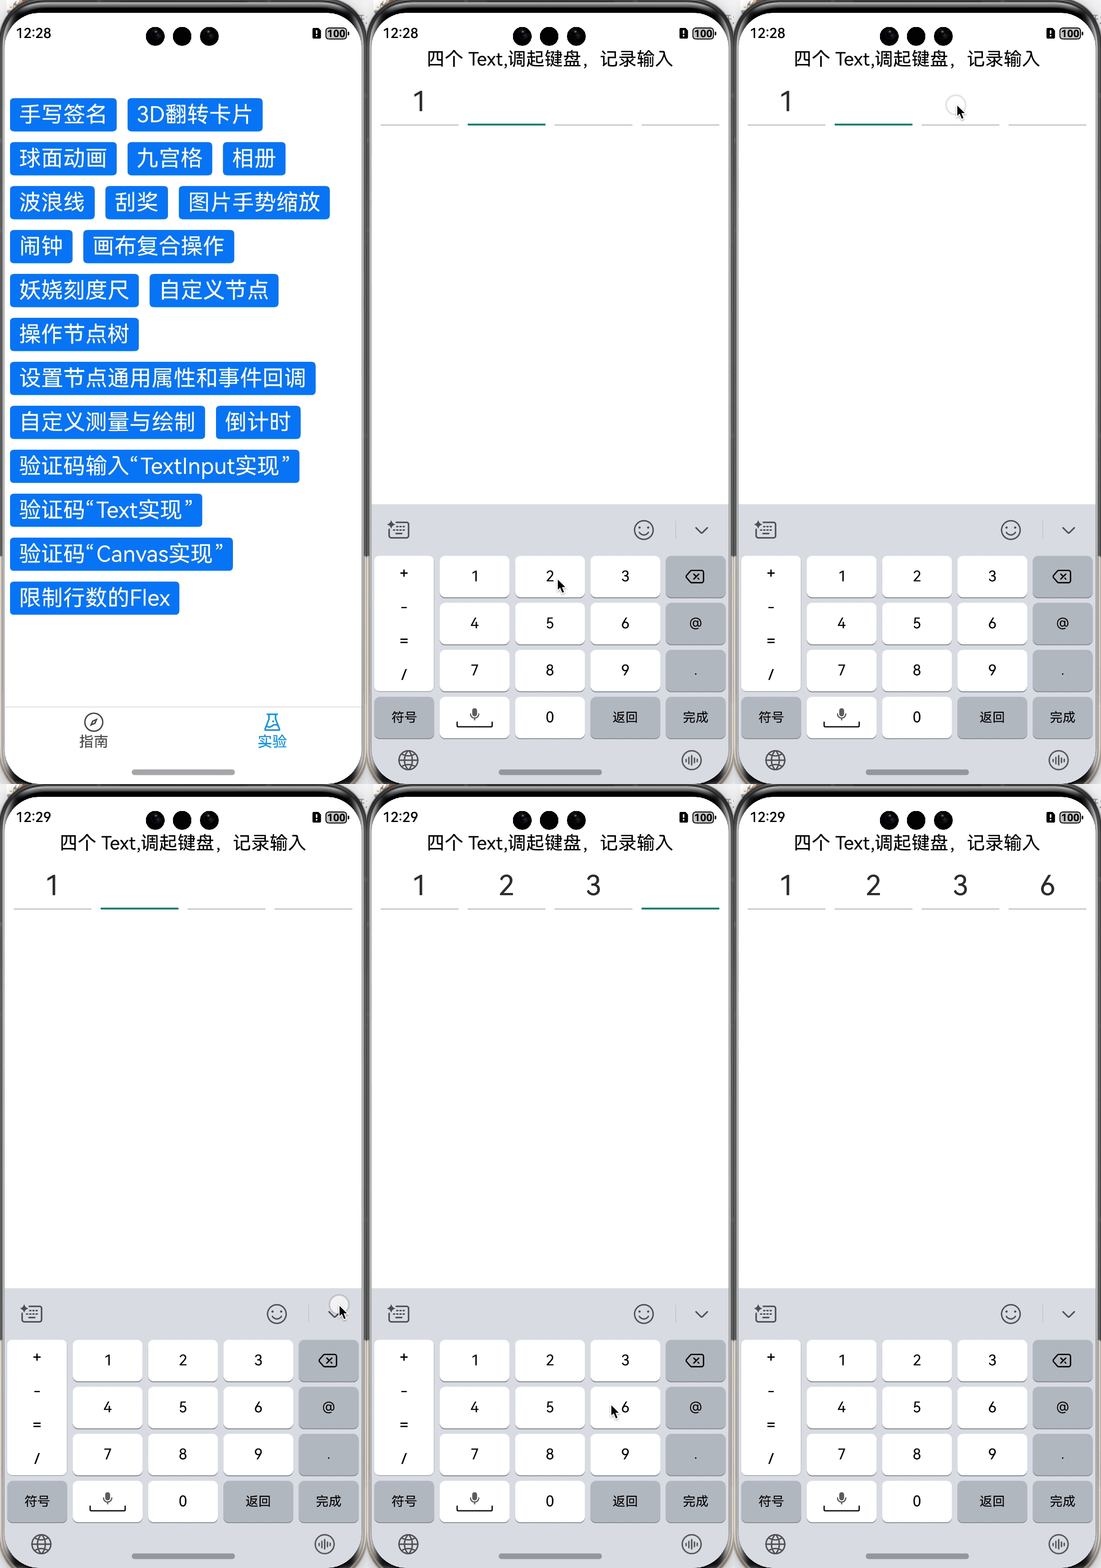
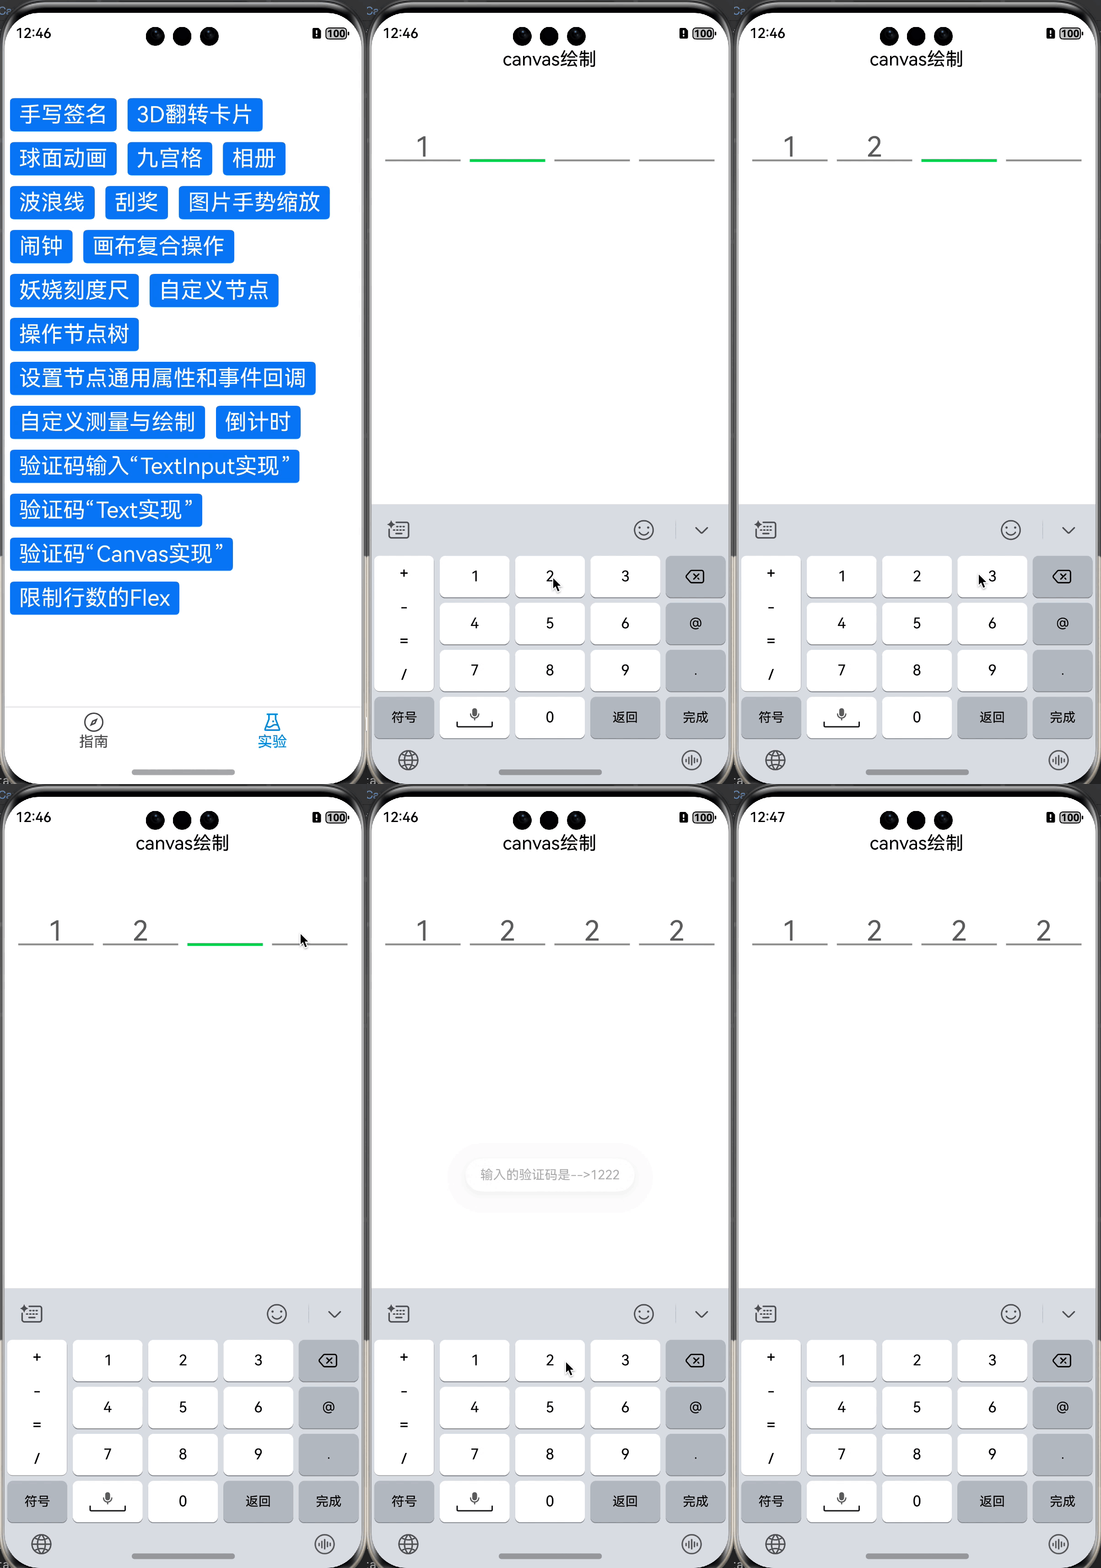
效果图、优缺点 先放一下效果图
多TextInput 优点 :只需要控制焦点就好,键盘的弹起、收起以及输入的内容我们不需要自己去监听,并且除了边框颜色之外,输入框内会有光标闪烁,也能给用户更强一些的提示缺点:需要控制没有获取到焦点的输入框不能点击、不能长按等。尝试多种方案 (设置 enable、focusable 等)均失败后,决定在输入框上面覆盖一个空白透明且大小和输入框相等的 Text 解决这个问题。有其他方案可以告诉我一下
多 Text 优点 :不用控制焦点,只需要使用变量控制一下样式就好缺点 :需要自己记录键盘输入的文字,并且没有光标闪烁,当前也可以自己搞个 gif 图或者写个动画来模拟光标
Canvas 绘制 优点 :我真的没想到有啥优点,可以自由的绘制边框、底色也算么?但现在的 pai 中有各种各样的Modifier来修改各种属性,实现自己绘制缺点 :全都得自己画,挺麻烦的
多个 TextInput 拼接 这里用四位验证码做例子:TextInput并排放一块,输入框限制输入 1 个字符,用Flex做父控件也行,用Row做父控件也行,无所谓,这不是重点。getUIContext().getFocusController().requestFocus(key:string)将焦点放在第一个输入框上,键盘就可以弹出来TextInput的onDidDelete和onChange或者onDidInsert事件,来判断下一个焦点放在哪个位置TextInput有输入字符时,认为输入完成,进行回调。
下面详细介绍一下每一步怎么做的,以及对应的想法
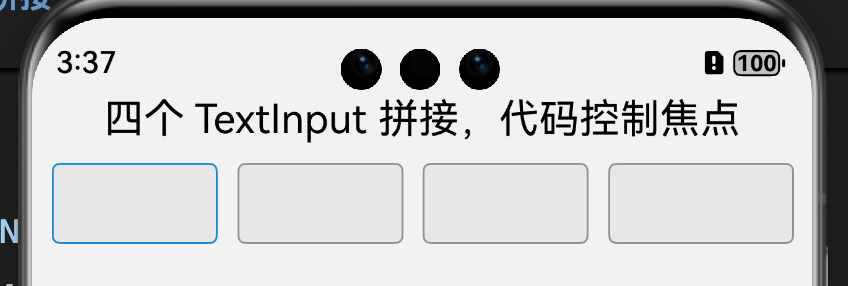
放置四个输入框 当前获取到焦点的输入框颜色要明亮一些,没有焦点的输入框颜色要暗淡一些。我们使用@Extend()做一个公用样式,传入当前是否是焦点控件来控制边框颜色
1
2
3
4
5
6
7
8
9
10
11
12
13
14
@Extend (TextInput )function textInputStyle (enable:boolean ){border ({width : 1 ,color : enable?"#1b91e0" :"#999999" ,radius : 4 ,style : BorderStyle .Solid ,textAlign (TextAlign .Center )layoutWeight (1 )maxLength (1 )maxLines (1 )type (InputType .Number )layoutWeight (1 ).height (40 )
为了在焦点变化的时候输入框背景能同步修改,这里用一个@State修饰的布尔数组表示哪个输入框获取焦点。同时为了省事,也定义了另外一个数组,方便使用 ForEach循环渲染。定义另外一个字符串数组来记录每个输入框的内容
1
2
3
4
5
6
7
8
9
10
11
12
13
@State inputValue : string [] = ["" , "" , "" , "" ]@State inputEnable : boolean [] = [true , false , false , false ] inputIndex : number [] = [0 , 1 , 2 , 3 ] build (Row () {ForEach (this .inputIndex , (index: number ) => {TextInput ({ text : this .inputValue [index] })id (index.toString ())margin ({ right : index == this .inputIndex .length - 1 ? 0 : 10 })textInputStyle (this .inputEnable [index])
这样我们就画出来了最基本的布局。但我们会发现进入页面后键盘不能自己弹出来,因为输入框没有获取到焦点。TextInput设置defaultFocus为 true,或者在页面展示的时候设置焦点
1
2
3
TextInput ({ text : this .inputValue [index] }).defaultFocus (this .inputEnable [index])Row (){}.onAppear (()=> {this .getUIContext ().getFocusController ().requestFocus ("0" )})
注意这里requestFocus()方法传入的参数"0",也就是上面TextInput的id的值.
焦点移动 输入时向后移动 但是这时候我们点击键盘输入的时候,发现光标并不会自动移动到下一个输入框上继续输入。这里需要我们进行控制。这个也比较简单,TextInput有一个输入内容发生变化时,触发的回调:onChange(callback: EditableTextOnChangeCallback)。我们可以在这个方法里面移动焦点
1
2
3
4
5
6
7
8
9
10
11
12
TextInput ().onChange ((value: string , previewText?: PreviewText ) => {this .inputValue [index] = value if (value.length == 1 ) { if (index != 3 ) {this .inputEnable [index+1 ] = true this .getUIContext ().getFocusController ().requestFocus ((index + 1 ).toString ())this .inputEnable [index] = false else {
输入完成回调 这就很简单了,定义一个函数变量,接收父布局传进来的函数,输入完成时回调这个函数就好
1
2
3
4
5
6
7
8
9
onFinishInput?: (value: string ) => void if (this .onFinishInput ) {let result = "" for (let i = 0 ; i < this .inputValue .length ; i++) {this .inputValue [i]this .onFinishInput (result)
到这里,我们已经实现了大部分功能:输入字符、保存字符、焦点向后移动、输入完成时回调。
删除时向前移动 这里需要注意一下:
刚开始想着在onChange事件中做处理,但当输入框中没有内容时,点击删除的时是没有回调的。怎么搞,翻翻文档,找到了onWillDelete和onDidDelete,并且这两个回调都是发生在onChange之前。onDidDelete事件中处理,逻辑就是上面说的那样
1
2
3
4
5
6
7
8
9
10
11
12
13
14
15
16
TextInput ().onDidDelete ((_ ) => {if (this .inputValue [index].length == 0 ) {if (index != 0 ) {this .inputValue [index-1 ] = "" this .inputEnable [index] = false this .inputEnable [index-1 ] = true this .getUIContext ().getFocusController ().requestFocus ((index - 1 ).toString ())else {this .inputValue [index] = ""
到这里我们就完成了大部分的工作,一个可以正常工作,随便调整背景的验证码输入框就完成了。
防止点击 一开始想法很简单,我们不是有个布尔类型数组保存着当前哪个输入框获取焦点么?没有焦点的输入框设置enable为false就可以了哇,移动焦点的时候先将目标输入框设置enable为true,然后再移动焦点就好了哇。
1 TextInput ().enabled (this .inputEnable [index])
我们在上面的代码中,都是先修改inputEnable数组值,然后再设置焦点,完美。很好。
1 Error message:The component doesn't exist, is currently invisible, or has been disabled.
难道是因为在请求焦点的时候,输入框的属性还没来得及完成修改?postFrameCallback:注册一个在下一帧进行渲染时执行的回调。按照示例把代码撸好,编译运行,尝试输入,又又又崩了,错误信息也一样。
1
2
3
4
5
6
7
8
9
10
11
12
13
14
15
16
17
Row (){ForEach (this .inputIndex ,(index:number )=> {RelativeContainer (){TextInput ({text :this .inputValue [index]})if (!this .inputEnable [index]){Text ().backgroundColor (Color .Transparent )alignRules ({left : {anchor : index.toString (), align : HorizontalAlign .Start },top : {anchor : index.toString (), align : VerticalAlign .Top },bottom : {anchor : index.toString (), align : VerticalAlign .Bottom },right : {anchor : index.toString (), align : HorizontalAlign .End }layoutWeight (1 ).height (40 ).margin ({right :index == this .inputIndex .length -1 ?0 :10 })
到这里,就解决了点击非焦点输入框的问题。
总结 看起来挺简单的,实际上一点也不难。
遗留下的一个问题:
附一个完整代码
1
2
3
4
5
6
7
8
9
10
11
12
13
14
15
16
17
18
19
20
21
22
23
24
25
26
27
28
29
30
31
32
33
34
35
36
37
38
39
40
41
42
43
44
45
46
47
48
49
50
51
52
53
54
55
56
57
58
59
60
61
62
63
64
65
66
67
68
69
70
71
72
73
74
75
76
77
78
79
80
81
82
83
import { hilog } from '@kit.PerformanceAnalysisKit' @Component FourTextInput {(value: string ) => void @State inputValue : string [] = ["" , "" , "" , "" ]@State inputEnable : boolean [] = [true , false , false , false ]inputIndex : number [] = [0 , 1 , 2 , 3 ]build (Row (){ForEach (this .inputIndex ,(index:number )=> {RelativeContainer (){TextInput ({text :this .inputValue [index]}).layoutWeight (1 ).textInputStyle (this .inputEnable [index]).maxLength (1 ).maxLines (1 ).id (index.toString ()).type (InputType .Number )onDidDelete ((_ )=> {error (0x01 ,"InputVerificationCode" ,`第${index} 个执行 onDidDelete` )if (this .inputValue [index].length == 0 ){if (index !=0 ){this .inputValue [index-1 ]="" this .inputEnable [index] =false this .inputEnable [index-1 ] =true this .getUIContext ().getFocusController ().requestFocus ((index-1 ).toString ())else {this .inputValue [index]="" onChange ((value: string , previewText?: PreviewText )=> {error (0x01 ,"InputVerificationCode" ,`第${index} 个onChange: value:${value} previewText: value-> ${previewText?.value} offset->${previewText?.offset} ` )this .inputValue [index]= valueif (value.length == 1 ){if (index != 3 ){this .inputEnable [index+1 ] =true this .getUIContext ().getFocusController ().requestFocus ((index+1 ).toString ())this .inputEnable [index] = false else {if (this .onFinishInput ){let result = "" for (let i =0 ;i< this .inputValue .length ;i++){this .inputValue [i]this .onFinishInput (result)if (!this .inputEnable [index]){Text ().backgroundColor (Color .Transparent ).alignRules ({left : {anchor : index.toString (), align : HorizontalAlign .Start },top : {anchor : index.toString (), align : VerticalAlign .Top },bottom : {anchor : index.toString (), align : VerticalAlign .Bottom },right : {anchor : index.toString (), align : HorizontalAlign .End }layoutWeight (1 ).height (40 ).margin ({right :index == this .inputIndex .length -1 ?0 :10 })onAppear (()=> {this .getUIContext ().getFocusController ().requestFocus ("0" )@Extend (TextInput )function textInputStyle (enable: boolean ) {border ({width : 1 ,color : enable ? "#1b91e0" : "#999999" ,radius : 4 ,style : BorderStyle .Solid ,textAlign (TextAlign .Center )layoutWeight (1 )maxLength (1 )maxLines (1 )type (InputType .Number )layoutWeight (1 )height (40 )export { FourTextInput }


