Sentry搭建及Android接入
因为sentry可以私有化部署,相比起bugly,我们可以做跟多的单独定制功能,所以决定将需要即时上报的日志放在sentry上。
搭建环境:
- Ubuntu18.04 64位
- sentry版本21.5.1
环境要求:
- Docker 19.03.6+
- Compose 1.24.1+
- 4 CPU Cores
- 8 GB RAM
- 20 GB Free Disk Space
由于sentry需要使用redis、postgreSQL,所以选在了在新的虚拟机上进行部署
安装docker
目前是在Ubuntu18.04上使用deb文件安装的。官方指导在这里https://docs.docker.com/engine/install/ubuntu/
在 https://download.docker.com/linux/ubuntu/dists/ 这里选择一下自己ubuntu的系统对应的文件夹(也就是系统版本代号),比如18.04对应bionic,然后进入pool/stable文件夹,选择对应的系统环境,比如ubuntu 18.04 64位,对应的地址应该是https://download.docker.com/linux/ubuntu/dists/bionic/pool/stable/amd64/,然后下载最新版本的软件,我现在下载的是
1 | |
然后按照顺序安装,安装完成后确认是否安装成功:
1 | |
这条命令会下载测试镜像并运行,如果安装成功,则会在终端打印对应信息
如果上面的下载地址无法访问的话,可以使用国内的清华大学镜像源,地址是 https://mirrors.tuna.tsinghua.edu.cn/docker-ce/linux/ubuntu/dists/bionic/pool/stable/amd64/
安装docker-compose
访问 https://github.com/docker/compose/releases/tag/1.29.2 下载linux版本,文件名字改成docker-compose,添加执行权限,并复制到 /usr/local/bin/文件夹下
1 | |
执行 docker-compose -v命令,能打印出版本信息证明安装程国平
安装sentry
访问 https://github.com/getsentry/onpremise 并克隆下来该仓库,仓库地址为:git@github.com:getsentry/onpremise.git 或者 https://github.com/getsentry/onpremise.git,执行文件夹中的install.sh。过程会比较漫长,在这个过程中会让你创建sentry的用户,输入邮箱和密码。这个用户也就是你之后登陆sentry网页使用的账号密码。
安装过程中需要拉取docker镜像,众所周知的原因,有很大可能会失败,我们可以将docker的镜像源替换为国内的,比如中科大。ubuntu下替换方式
1 | |
启动及使用
在上一步安装完成后的控制台会告诉你启动sentry服务的命令docker-compose up -d,
在浏览器中访问sentry服务器的ip:9000, 输入上一步创建的邮箱和密码就可以登录了。接下来可以跟着引导查看一下基本功能的使用。
现在我们创建一个Android应用,创建好了之后会有对应的引导提示如何在Android中使用sentry。
添加仓库
1
2
3repositories {
mavenCentral()
}添加依赖
1
implementation 'io.sentry:sentry-android:4.3.0'在Androidmanifest.xml中添加应用信息
1
2
3<application>
<meta-data android:name="io.sentry.dsn" android:value="http://b3a3844e753f4734b7ca1d6b154e6e06@192.168.102.181:9000/2" />
</application>这里的value值可以在sentry项目设置中找到。
使用
1
2
3
4
5
6
7
8
9
10
11
12
13
14
15
16import io.sentry.Breadcrumb;
import io.sentry.Sentry;
import io.sentry.SentryEvent;
import io.sentry.SentryLevel;
import io.sentry.protocol.Message;
import io.sentry.protocol.User;
Sentry.captureMessage("captureMessage INFO", SentryLevel.INFO);
Sentry.captureException(new Exception("exception"));
Sentry.captureEvent(new SentryEvent());
//设置全局用户信息
User user = new User();
user.setEmail("a@a.com");
String userId = UUID.randomUUID().toString();
user.setId(userId);
Sentry.setUser(user);
关于混淆
如果应用经过混淆,我们需要将mapping文件上传到sentry平台,才能定位到错误代码所在位置。
首先在app/build.gradle中添加plugin:
1 | |
然后在工程根目录下的build.gradle文件中添加
1 | |
我们还需要在项目根目录下添加一个sentry.properties文件,用来配置我们的mapping文件上传到哪个项目中
1 | |
这里的org的值在Organization Settings中查看,是Organization Slug的值,而不是Display Name的值
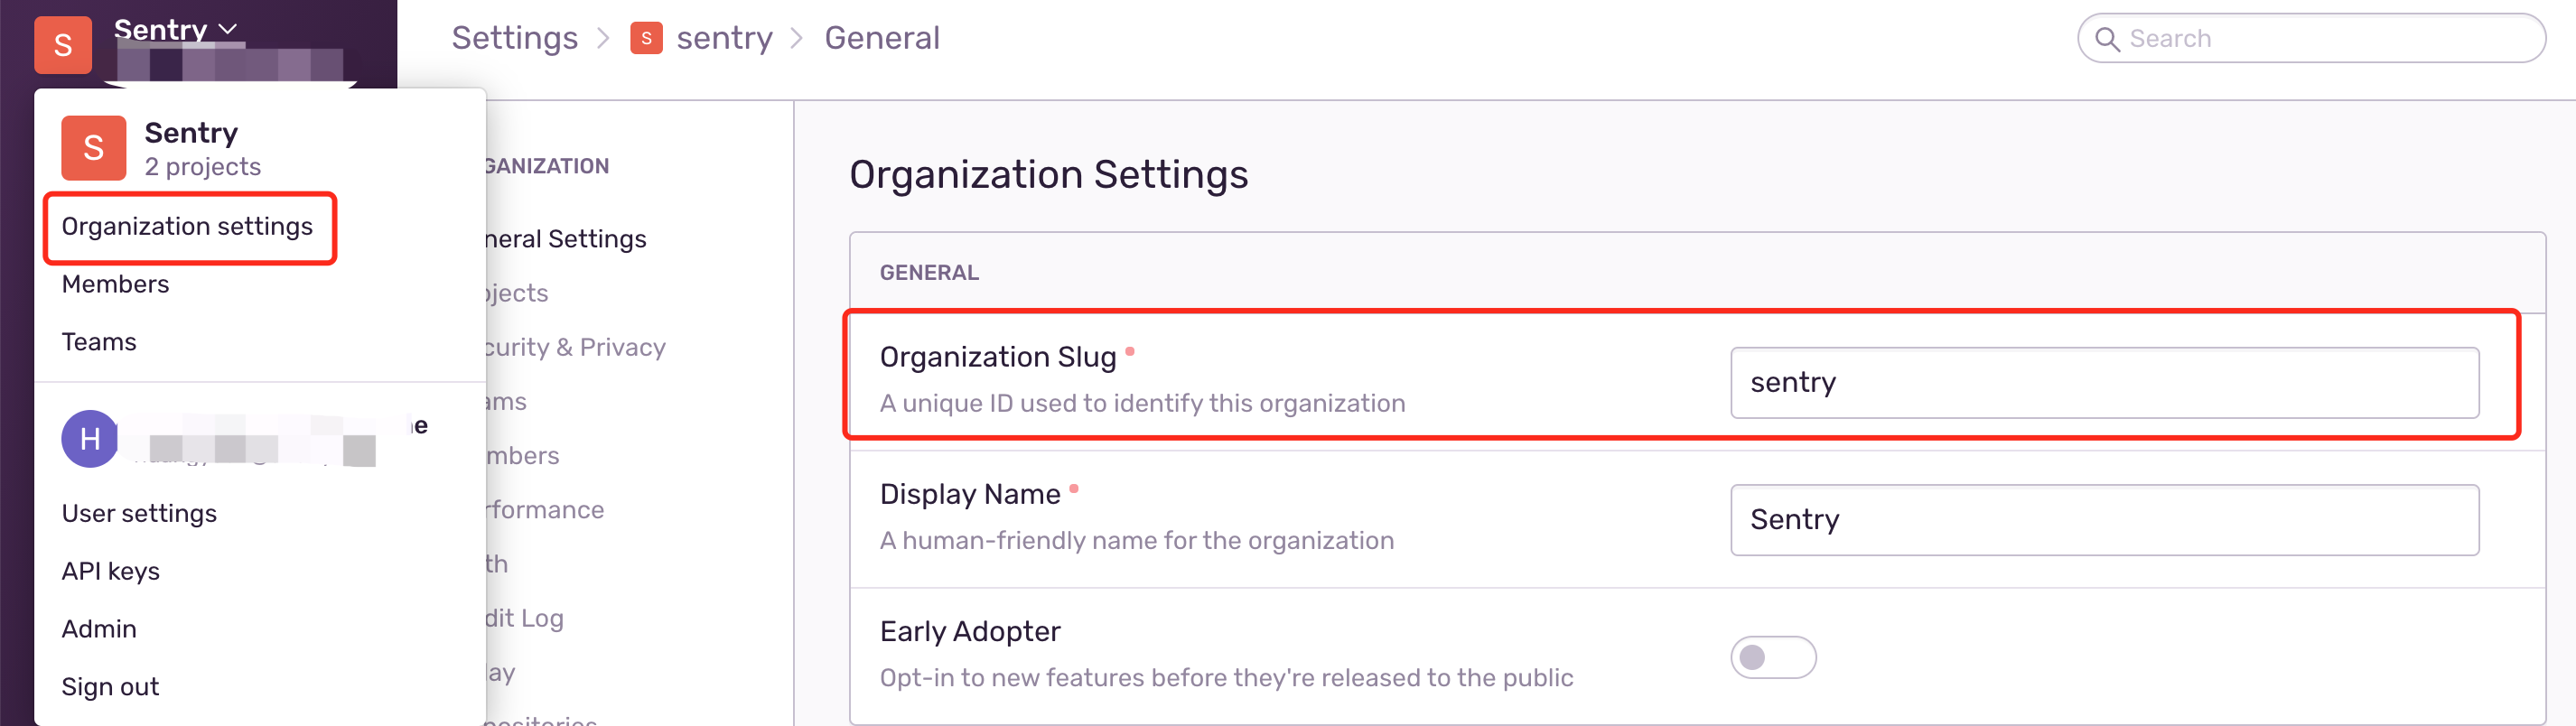
token值在上图中的 API keys里面,没有的话创建一个新的就好,权限我是用的默认。
然后我们打个release包,上传成功后会在控制台打印出对应信息。我们可以在项目设置 ProGuard中找到上传的mapping文件。
如果不希望自动上传mapping,我们可以将其关闭,使用sentry-cli进行手动上传
在app/build.gradle中添加如下配置
1 | |
sentry-cli的安装在这里 https://docs.sentry.io/product/cli/installation/
sentry-cli的配置 https://docs.sentry.io/product/cli/configuration/
sentry-cli 的使用 https://docs.sentry.io/product/cli/dif/#proguard-mapping-upload
以上