网站免费升级https
昨天跟着酷壳网左耳朵耗子的文章把自己在亚马逊主机上的网站变成https的安全访问了,证书不是自签名的,也不是花钱购买的。据说https的网站在搜索引擎中的rank值会比http的更高一些。升级完成后的浏览器截图如下: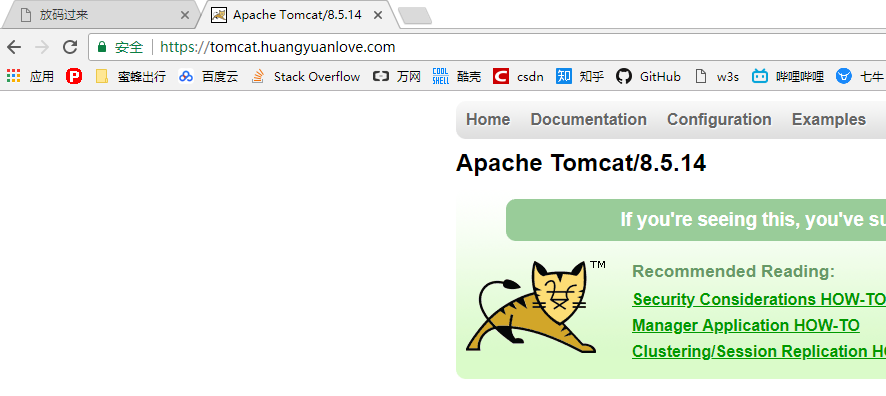
下面是这次升级的记录。
为网站开启https安装证书非常简单,我用的是 Let’s Encrypt 这个免费的解决方案。
- 打开https://certbot.eff.org/这个网页
- 在Software 和 System选项里面选择你所使用的软件、系统,我用的nginx+ubuntu16.04
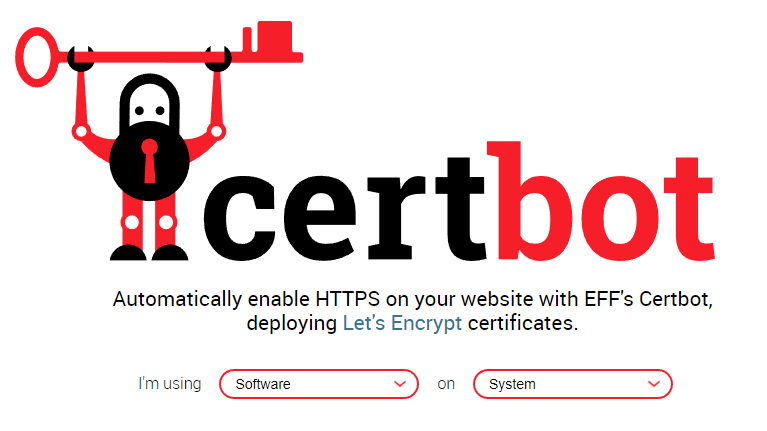
- 然后会跳转到一个新的网页,照着做就是了。
就以nginx+ubuntu16.04为例:安装成功后执行1
2
3
4
5$ sudo apt-get update
$ sudo apt-get install software-properties-common
$ sudo add-apt-repository ppa:certbot/certbot
$ sudo apt-get update
$ sudo apt-get install python-certbot-nginx$ sudo certbot --nginx
让你输入你的邮箱,然后是同意用户协议,然后是是否公开你的邮箱。
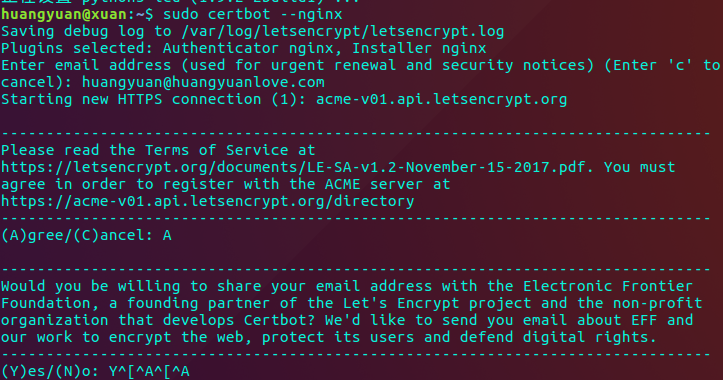
接着会列出来nginx下所有配置的服务名称,输入你想要开启https的服务名称所对应的编号,如果想为多个服务开启https,中间以空格分隔。然后nginx重新加载一个配置或者重启一下。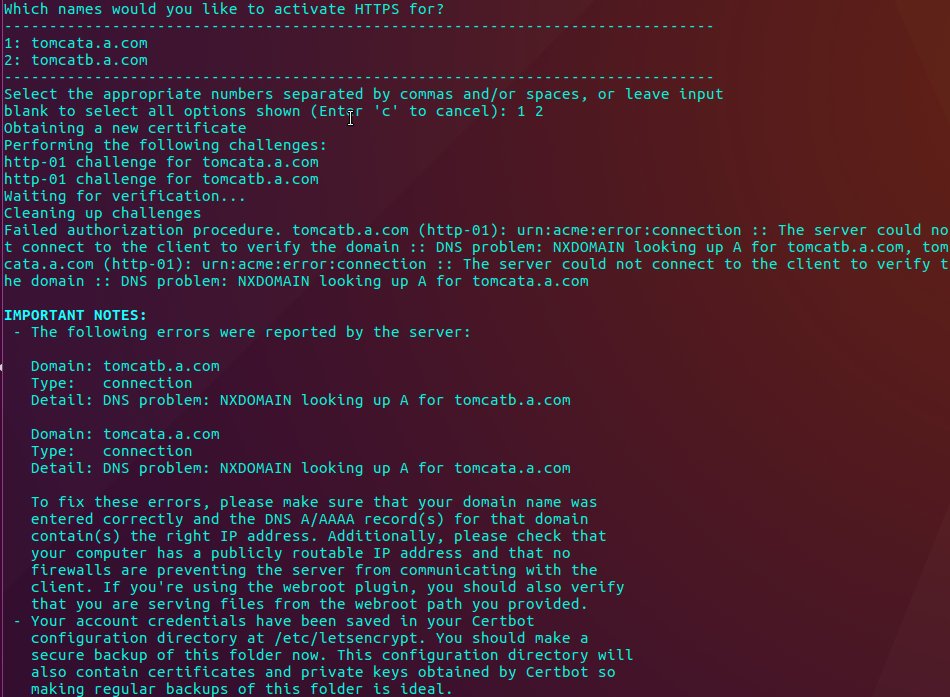
我个人服务器上的nginx配置的server_name是tomcat.huangyuanlove.com,域名是在万网买的,然后在万网控制台添加一个A解析,把tomcat.huangyuanlove.com指向服务器的ip即可。
但是 Let’s Encrypt 的证书90天就过期了。所以还需要加上自动更新,使用crontab -e命令假如如下的定时作业(每个月强制更新一下)需要注意的是,如果网站中有使用http的地方都要改成https,要不然一些资源文件如图片、js、css等非https的请求连接都会被ban掉。1
20 0 1 * * /usr/bin/certbot renew --force-renewal
5 0 1 * * /usr/sbin/service nginx restart
关于ubuntu安装和配置nginx,我也是在官网找的教程,网址在这里https://www.nginx.com/resources/wiki/start/index.html,就知道你们不想看,安装命令如下:
1 | |
安装完成后,nginx配置文件在/etc/nginx/nginx.conf,在http标签中添加server:
1 | |
给自己的添加https证书后,Certbot会修改你的nginx中的server配置,修改的内容如下:
1 | |
1 | |
基本上就是这样了,没有别的了。
以上,嗯,对了,12306你什么时候按照这个教程做一下你的证书?
网站免费升级https
https://blog.huangyuanlove.com/2018/04/01/网站免费升级https/